Replacing garage door bottom rollers may be a DIY project depending on the type of roller. With common wear and tear, your garage door will make some noise, but if it has gotten worse over time, it might be time to replace the bottom roller on your garage door.
But you don’t have to worry, as it’s not a particularly difficult process, and you might be able to do it using only basic tools that you probably have in your garage. We will list the steps for how to replace garage door rollers yourself.
At the same time, you should exercise caution when replacing a garage door roller, as garage doors are heavy, and you could injure yourself. That’s why we have prepared a guide on how to replace the bottom garage door rollers.
Bottom Roller Replacement Guide Overview:
1. Different types of garage door rollers
2. How to replace garage door bottom rollers on your own
3. Reaching out to a garage door expert
Different Types of Garage Door Rollers
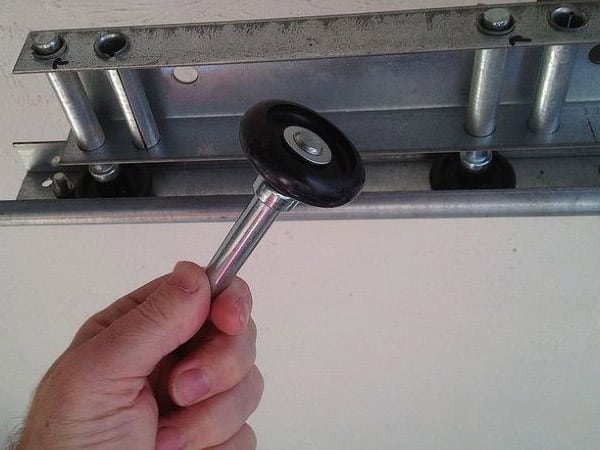
Even though, as you’ll find out in a second, you could replace the rollers without being an experienced repairman, the likelihood that you’ll face some issues with the bottom rollers largely depends on their type. Plastic bottom rollers usually need to be replaced just after a few years of service, as their durability is the lowest.
That’s why we recommend choosing either steel or nylon rollers, which are a little bit more expensive but will serve you for a much longer period of time. Though it really depends on how many times per day you close and open your garage door, you should expect steel garage rollers to last you for around ten years.
However, when compared to plastic rollers, they are much louder, and you’ll have to remember to lubricate the rollers every once in a while. Nylon garage door rollers, on the other hand, don’t generate much noise and will serve you even longer than steel ones would.
How to Replace Garage Door Bottom Rollers on Your Own
Tools needed to replace bottom rollers on your garage door:
- Locking pliers
- Screwdriver
- Step Stool (if replacing rollers alone)
- Garage Door Lubricant
- Hammer (in some cases)
1. To start replacing the bottom rollers on your garage door, it can be done either manually or using the garage door opener. If you are like most garage owners, and you have a garage door opener, unplug it before you proceed further. During the entire process, you’ll be standing next to your garage door, and if it closes by accident, it could injure you seriously, which is why it’s best to be 100% sure. As an extra precaution, you could also place a stepladder under the garage door.
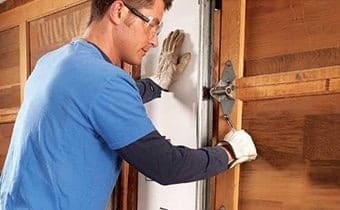
2. Next, you’ll need locking pliers. With their help, bend one side of the track near the seam forward so that in a moment, you’ll be able to pop the roller out. Now, it’s possible to complete the next part on your own, but it would be best if you had someone who could help you.
3. Lower the door until the rollers are at the height of the bent track. Then, you’ll have to hold the door in place, which you could do using one hand, or, as we’ve mentioned previously, someone else could do it for you so that you could focus on the task at hand.
4. Now, you’ll need a screwdriver or a pry bar. Using either one of these tools, pry the old roller out. Make sure to warn the other person when you’ll start doing it. After the bottom roller has been removed, slide the new roller into the bracket. Depending on the type of rollers you bought, you might want to use the lubricant so that the roller would work flawlessly.
5. Raise the door (or ask your companion to do so) so that the bent track and the place where previously there was a roller are at the same height once again. Then, it’s time to reinsert the bottom roller into the track. You should be able to do so without any tools, but in some cases, you might need to use a hammer so that the roller would return to its former place.
6. Once you’ve replaced the roller, it’s time to focus on the remaining ones. Their number depends on the size of your garage door – the larger the door, the more rollers you’ll have to replace. Just remember not to touch the top roller. Change the position of the door to focus on other rollers, and repeat the same process.
7. When you’ve finished with one side, it’s time to completely open your garage door and close the part of the track that you’ve previously bent. Once again, do so using pliers. Next, it’s time to focus on the other side of the door – just repeat all the steps.
8. When you are done replacing the rollers on both sides of the garage door, you can plug in your garage door opener and check whether everything is working as it should.
When to Reach Out to an Expert
Although garage doors are rarely completely silent, you might discover that with time, the ones in your garage have started to be extremely noisy. The worn-out bottom rollers might be the culprit, especially if you have plastic ones, which aren’t particularly durable.
If you need further help then check out our roller replacement and repair service or contact us at (844) 388-3587
Check out what one of our happy customers has to say about us:
“Kyle provided outstanding service and information during his work on our garage door. The new Liftmaster opener now has WiFi connectivity, battery backup and motion detection which turns the opener’s light on upon entering the garage. Many parts needed to be replaced as the existing system was 21+ years old. Before getting busy with those he showed me and explained the wear on the bearings and drums. The springs were 13 years old and we’re lifting 42lbs instead of the acceptable 5lbs. We did have a lot of work done. New door opener, rollers, bearings, drums, cables, (the existing cables were not the appropriate gauge for our door), and bottom door seal. We can’t believe how quiet this garage door now opens and closes. Fantastic!”- Bob Sakas
Find more of our 3,463 reviews on Google – We have a 4.8-star rating!


